
Cookie는 회원정보 저장이나 자동로그인 등 여러 정보를 기억하기 위해
클라이언트의 PC에 텍스트 파일로 저장되어 사용됩니다.
|
1
2
3
4
5
6
7
8
9
10
11
12
13
14
15
16
17
18
19
20
21
22
23
24
25
26
27
28
29
|
from flask import Flask, url_for
from flask import render_template
from flask import request, make_response
app = Flask(__name__)
@app.route('/')
def index():
return render_template('index.html')
@app.route('/setcookie', methods = ['POST', 'GET'])
def setcookie():
if request.method == 'POST':
user = request.form['nm']
resp = make_response(render_template('readcookie.html'))
resp.set_cookie('userID', user)
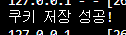
print('쿠키 저장 성공!')
return resp
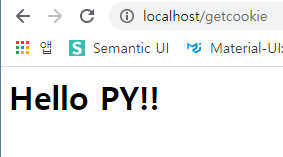
@app.route('/getcookie')
def getcookie():
name = request.cookies.get('userID')
return '<h1>Hello '+name+'!!</h1>'
if __name__ == '__main__' :
app.run(host = '0.0.0.0', port = 80, debug = True)
|
cs |
<app.py>
위의 코드에서 보면 index()함수에서 index.html로 이동됩니다.
|
1
2
3
4
5
6
7
8
9
|
<html>
<body>
<form action = "/setcookie" method = "POST">
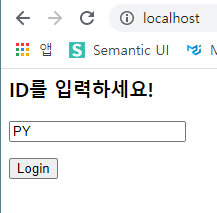
<p><h3>ID를 입력하세요!</h3></p>
<p><input type = 'text' name = 'nm'/></p>
<p><input type = 'submit' value = 'Login'/></p>
</form>
</body>
</html>
|
<index.html>
index.html에서는 ID를 POST 형식으로 입력받고 Login버튼을 통해
/setcookie쪽으로 넘기게 됩니다.
다시 app.py의 setcookie() 함수를 봅니다.
index.html에서 POST 형식으로 입력된 ID를 nm이라는 변수로 받아와서
request.form을 통해 nm이라는 변수에 있는 ID값을 user변수에 저장합니다.
그리고 resp에 make_response() 함수를 이용해 쿠키를 객체로 저장되어지게 하고
usuerID에 user에 저장된 ID값을 쿠키 repone 객체에 저장합니다.
쿠키 저장에 성공했다면 print함수를 통해 터미널에 쿠키 저장에 성공했다고 출력합니다.

Cookie는 클라이언트에 저장되어 사용되기 때문에 로그인이나 회원정보를 관리할 때 있어서
보안상에 문제가 생길 수 있습니다. 이것을 방지하기 위해 Session을 사용합니다.
다음은 Session을 알아보겠습니다.
'Flask' 카테고리의 다른 글
| [Flask] Session (0) | 2020.09.26 |
|---|---|
| [Flask] request, jinja2 template를 이용한 python Dictionary collection (0) | 2020.09.26 |
| [Flask] url_for, render_template를 이용해 LOGIN BOX CSS 적용하기 + Bootstrap (4) | 2020.09.24 |
| [Flask] url_for, render_template를 이용해 이미지 출력하기 (0) | 2020.09.24 |
| [Flask] escape, request 활용 (0) | 2020.09.24 |